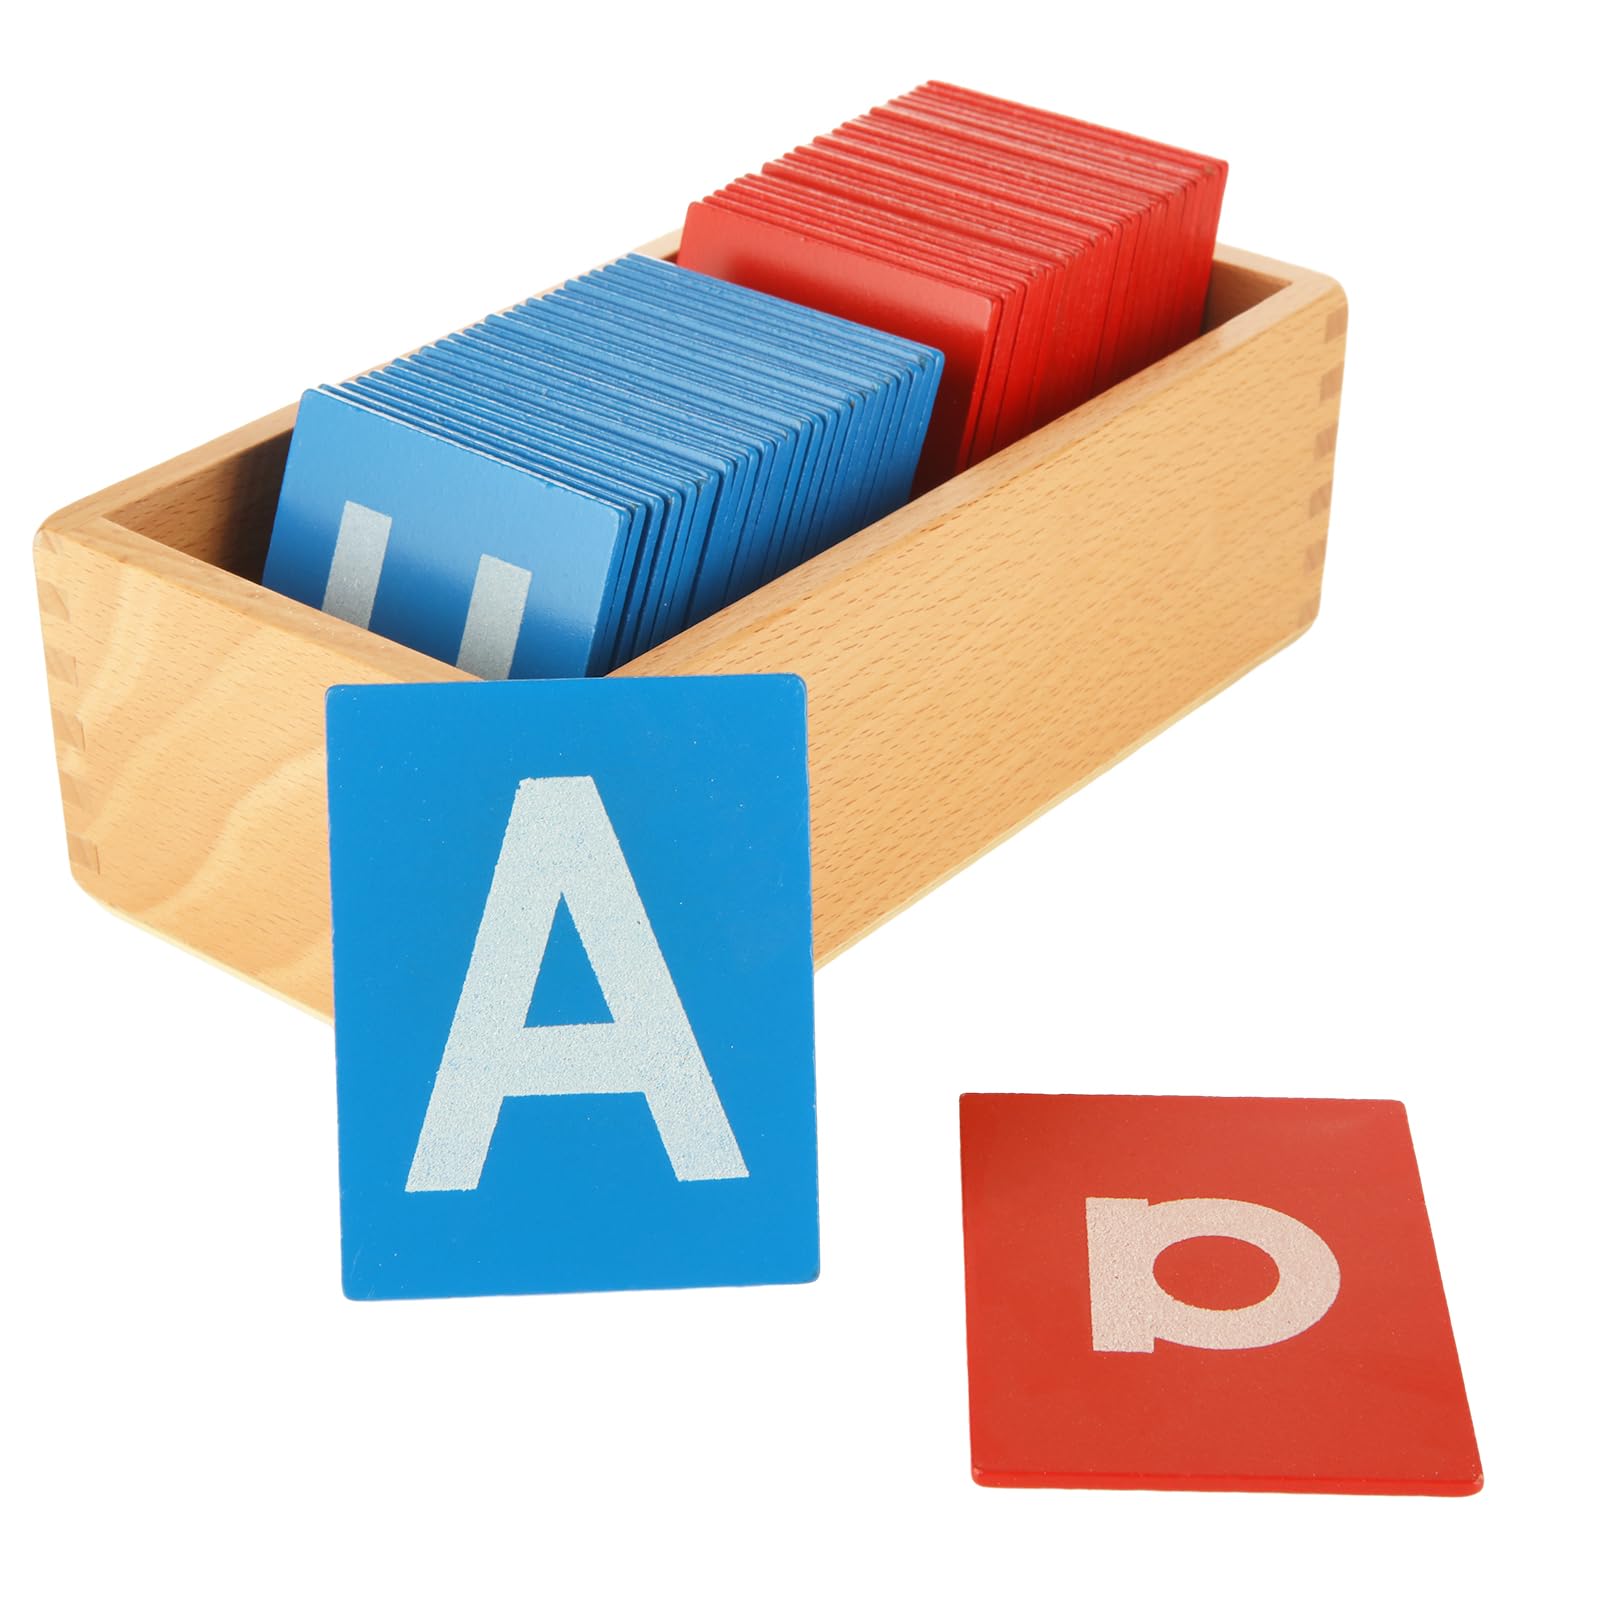
Montessori cylinder blocks are precision-engineered materials that develop visual discrimination, fine motor control, and early mathematical thinking. Knobbed cylinders (ages 2.5-4) teach size discrimination through self-correcting placement. Knobless cylinders (ages 3.5-6) extend the concept with color-coded sets for pattern building and comparison. They are among the most important sensorial materials in the Montessori curriculum.
There is a moment in every Montessori classroom that stops visitors in their tracks. A 3-year-old is sitting alone at a small table, working with a set of wooden cylinders. They remove each one, study it, and carefully place it back into a matching socket. No adult is guiding them. No reward is offered. The child is doing this for the sheer satisfaction of getting it right — and when the last cylinder slides perfectly into place, the look of concentration gives way to a quiet, private smile.
This is the cylinder block at work. It is one of the oldest and most refined materials in the Montessori method, designed by Maria Montessori herself over a century ago and virtually unchanged since. That is not because no one has tried to improve it — it is because the design is already optimal for what it teaches. Modern cognitive science has confirmed what Montessori observed: this deceptively simple material develops visual discrimination, fine motor control, mathematical thinking, and the capacity for deep concentration in ways that few other educational tools can match.
This guide covers everything parents need to know about Montessori cylinder blocks — the four types of knobbed cylinders, the extension to knobless cylinders, how they work, why they work, and how to choose and use them at home. If you are new to Montessori materials, start with our guide on what Montessori toys are for context on the philosophy behind the design.
What are Montessori cylinder blocks
Montessori cylinder blocks are hardwood blocks, each containing 10 removable cylinders with small knobs on top. The cylinders vary systematically in one or two dimensions (height, diameter, or both), and each fits into a single matching socket carved into the block. There are four blocks in the complete set:
Block 1 — Variation in diameter only. All cylinders are the same height. The diameter decreases from thick to thin. This isolates the concept of width.
Block 2 — Variation in height and diameter together (same direction). Cylinders decrease in both height and diameter simultaneously. The largest cylinder is tall and wide; the smallest is short and narrow.
Block 3 — Variation in height only. All cylinders have the same diameter. The height decreases from tall to short. This isolates the concept of height.
Block 4 — Variation in height and diameter together (opposite direction). As height increases, diameter decreases. The tallest cylinder is the thinnest; the shortest cylinder is the widest. This is the most challenging block because it requires tracking two dimensions moving in opposite directions.
Why four blocks matter
Each block isolates a different perceptual challenge. This isolation of difficulty is a cornerstone of Montessori material design. Instead of asking the child to process multiple variables simultaneously (which overwhelms the developing brain), each block presents one clear concept:
- Block 1: Can you see differences in width?
- Block 2: Can you see differences in overall size?
- Block 3: Can you see differences in height?
- Block 4: Can you see differences when two dimensions oppose each other?
By the time a child has mastered all four blocks individually, their visual discrimination is remarkably refined. They can perceive and categorize dimensional differences that most adults take for granted.
The science behind cylinder blocks
Visual discrimination development
Research in developmental psychology confirms that the ability to discriminate between similar visual stimuli develops rapidly between ages 2 and 5, and that this development is experience-dependent. A study published in Developmental Psychology found that children who regularly practiced size comparison tasks showed measurably faster visual processing speeds and greater accuracy in size discrimination than control groups.
Cylinder blocks provide an ideal training ground because the differences between adjacent cylinders are deliberately small. The difference between cylinder 5 and cylinder 6 is not dramatic — the child must look carefully, compare, and make a judgment. This is perceptual refinement at its core.
Fine motor and writing preparation
The knobs on the cylinders are one of Montessori’s most clever design decisions. Each knob is sized so that the only comfortable way to grip it is with the three-finger pinch: thumb on one side, index and middle finger on the other. This is the tripod grip — the exact hand position used for holding a pencil.
A child who works with cylinder blocks daily for months has practiced the writing grip hundreds of times before ever picking up a pencil. This indirect preparation is why Montessori children often have an easier transition to writing than their peers — their hands are already trained.
Concentration and executive function
Dr. Angeline Lillard, a developmental psychologist at the University of Virginia, has documented that Montessori materials like cylinder blocks build sustained attention and executive function. The task requires:
- Planning: Study the empty block and the loose cylinders before starting
- Comparison: Hold two cylinders side by side to determine which is larger
- Decision-making: Choose which cylinder goes where
- Error monitoring: Notice when a cylinder does not fit properly
- Self-correction: Find and fix errors without external feedback
This is a complete executive function workout disguised as a simple matching activity.
The four knobbed cylinder blocks in detail
Block 1: Diameter variation
What varies: Diameter only (thick to thin) What stays constant: Height Difficulty: Easiest Introduce first: Yes, this is the starting block
The cylinders in Block 1 all stand at the same height, but their diameters graduate from approximately 55mm down to 10mm. When the child removes them and attempts to replace them, they must match each cylinder’s width to the correct socket. A cylinder that is too wide physically cannot fit; one that is too narrow drops in but leaves visible empty space around the edges.
Control of error: If a cylinder is placed in a socket that is too wide, it fits but visibly wobbles and sits lower. If it is placed in a socket that is too narrow, it will not enter at all. The final cylinder makes the error obvious — if all preceding placements were wrong, the last cylinder has nowhere to go.
Block 2: Height and diameter decrease together
What varies: Both height and diameter decrease together What stays constant: Proportional relationship (all cylinders are roughly the same shape, just different sizes) Difficulty: Moderate Introduces: The concept of overall size comparison
This is the most intuitive block because it maps to everyday experience — things come in different overall sizes (small, medium, large). The biggest cylinder is both the tallest and the widest. The smallest is both the shortest and the narrowest.
Block 3: Height variation
What varies: Height only (tall to short) What stays constant: Diameter Difficulty: Moderate to challenging Key learning: Since all cylinders have the same diameter, they all fit into any socket. The child must use height comparison exclusively.
This block is particularly interesting because the diameter control of error is removed. Every cylinder physically fits into every socket. The child must rely entirely on visual comparison of height — does this cylinder stick up too far? Does that one sit too low? This forces a more refined level of observation.
Block 4: Height and diameter oppose
What varies: As height increases, diameter decreases (and vice versa) What stays constant: Nothing — both dimensions change in opposite directions Difficulty: Most challenging Key learning: Tracking two variables simultaneously in opposite directions
Block 4 is the most cognitively demanding because the child must inhibit the natural assumption that tall things are also wide. The tallest cylinder is the thinnest. The shortest is the widest. This requires flexible thinking that challenges even some adults when they first encounter it.
How to present cylinder blocks
The Montessori presentation is specific and deliberate. Each step has a purpose.
Preparation
- Choose a work mat or clear table space
- Carry the block with two hands to the workspace (this teaches careful handling of materials)
- Position the block with the cylinders facing the child
The presentation
- Sit to the child’s right if you are right-handed (so your dominant hand does not block their view)
- Using your dominant hand, grip the knob of the far-right cylinder with the three-finger pinch
- Slowly lift the cylinder straight up
- Place it on the table in front of the block, to the right
- Continue removing all 10 cylinders from right to left, placing each randomly on the table
- Pause. Let the child see all the empty sockets and all the loose cylinders
- Pick up one cylinder, study it, look at the sockets, and slowly place it in the correct one
- Invite the child to continue: “Would you like to try?”
- Step back. Do not help. Do not correct.
Common presentation mistakes
Correcting the child’s errors. The material self-corrects. If a cylinder is in the wrong socket, the child will discover this when a later cylinder does not fit. This discovery is the learning moment — stealing it by correcting early robs the child of the experience.
Showing all four blocks at once. Present Block 1 first. Let the child work with it for days or weeks until they can complete it independently without errors. Then present Block 2. Rushing through all four blocks dilutes the learning.
Talking too much during the presentation. The presentation is mostly silent. Your hands show what to do. Words are minimal: “Watch.” “Would you like to try?” The silence focuses the child’s attention on the visual and tactile experience.
Knobless cylinders: the extension
After a child has mastered the four knobbed cylinder blocks (typically around age 3.5-4), the knobless cylinders offer a more advanced challenge. These are free-standing cylinders without knobs and without a block. They come in four color-coded sets:
| Set | Color | Variation | Corresponds to |
|---|---|---|---|
| Set 1 | Red | Diameter only | Block 1 |
| Set 2 | Yellow | Height and diameter together | Block 2 |
| Set 3 | Blue | Height only | Block 3 |
| Set 4 | Green | Height and diameter opposed | Block 4 |
Why knobless cylinders are harder
Without the block and sockets, there is no built-in control of error. The child must create their own order — arranging cylinders from largest to smallest (or smallest to largest) on a flat surface. This requires:
- Internal sense of order (no external frame)
- Comparison between all 10 pieces simultaneously
- Self-evaluation (does this sequence look right?)
- Construction of patterns and arrangements
Activities with knobless cylinders
Basic seriation: Arrange one set from largest to smallest or tallest to shortest.
Two-set comparison: Combine two color sets and build matching pairs (the red cylinder that is the same diameter as the blue cylinder that is the same height).
Tower building: Stack cylinders from different sets to create towers and structures, introducing early engineering concepts.
Pattern making: Create patterns (red, blue, red, blue) or gradient arrangements that combine aesthetic sense with mathematical ordering.
Four-set integration: Arrange all four sets simultaneously, finding relationships between color sets. This is the most advanced work and requires sustained concentration.
Buying guide: what to look for
Quality indicators
Wood type. Beechwood and birch are the standard materials for quality cylinder blocks. Avoid sets made from softwood (pine) or MDF, which do not hold the precision tolerances needed.
Machining precision. This is the single most important quality factor. Each cylinder should fit its socket snugly — not tight, not loose. There should be no wobble when correctly placed. Pick up the block and turn it upside down: properly fitted cylinders should stay in their sockets briefly before gravity pulls them out.
Finish. Non-toxic lacquer or food-safe oil. The finish should be smooth and consistent. Check that knobs are securely attached and the edges of sockets are clean (no splinters or rough spots).
Consistent graduation. The size difference between adjacent cylinders should be uniform and progressive. If the first three cylinders are obviously different but cylinders 7, 8, and 9 look identical, the manufacturing is poor.
Recommended products
| Product | Quality | Cylinders per Block | Material | Price per Block |
|---|---|---|---|---|
| Nienhuis Montessori | Premium (classroom) | 10 | Beechwood | $80-100 |
| Elite Montessori | Good (home/school) | 10 | Beechwood | $35-50 |
| Adena Montessori | Good (home) | 10 | Beechwood | $25-40 |
| Generic Amazon sets | Variable | 10 | Mixed | $15-25 |
Elite Montessori Knobbed Cylinder Blocks Set — This is the best value for home use. The beechwood construction is solid, the machining is precise enough for effective self-correction, and the finish is smooth and non-toxic. A full set of four blocks runs approximately $120-150, which is significantly less than classroom-grade Nienhuis materials but adequate for home use.
Montessori Knobless Cylinders Complete Set — For the knobless cylinders, look for sets with consistent color saturation and precise dimensional graduation. The four color sets typically sell together for $40-60.
Parent tip: If budget is a concern, buy Block 1 first and only Block 1. Your child will work with it for weeks or months before needing a second block. This spreads the cost over time and ensures you are investing in something your child is actually ready to use.
Cylinder blocks in the broader Montessori sensorial curriculum
Cylinder blocks are the gateway to the sensorial area. They are typically the first sensorial material presented because:
- The concept is intuitive. Even without a presentation, most children understand that cylinders go into holes.
- The control of error is clear. Unlike more abstract materials, the feedback is immediate and physical.
- The fine motor demand is appropriate. The pinch grip is challenging but achievable for most 2.5-year-olds.
After cylinder blocks, the sensorial curriculum progresses to:
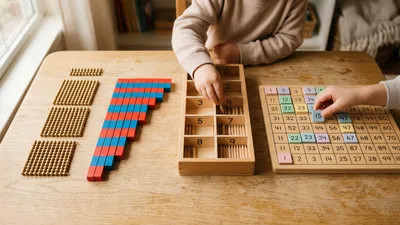
- Pink Tower: 10 cubes varying in size, stacked from largest to smallest. Extends three-dimensional size discrimination.
- Brown Stair (Broad Stair): 10 prisms varying in width, arranged in order. Extends width discrimination to larger scale.
- Red Rods: 10 rods varying in length. Introduces length as a concept and prepares for the Number Rods in mathematics.
- Color Tablets: Three boxes of color tablets progressing from primary colors to fine gradations. Develops color discrimination.
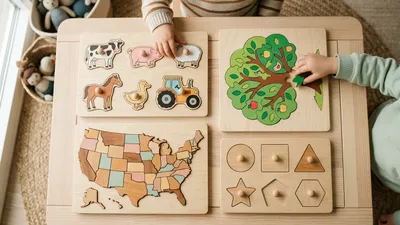
- Geometric Solids: Three-dimensional shapes for tactile and visual exploration of geometry.
Each material builds on the discriminatory skills developed by the one before it. The cylinder blocks lay the foundation for all of them. For more on mathematical development, see our guide to the best Montessori math toys.
Using cylinder blocks at home
Setting up the workspace
Designate a low shelf where the cylinder blocks live. The child should be able to carry the block (with two hands) to a work table or mat independently. The workspace should be:
- Flat and stable (table or floor mat)
- Well-lit (the child needs to see subtle size differences)
- Quiet (concentration requires minimal distraction)
- Available whenever the child wants to work (not locked away or out of reach)
How often should a child work with cylinder blocks?
There is no prescribed frequency. In a Montessori classroom, children choose their own work, and some children return to the cylinder blocks daily for weeks while others use them intermittently. At home, make them available and observe. If your child gravitates to them, they are getting what they need. If they ignore them for a while, that is fine too — the interest will return.
Extensions for home use
Once your child has mastered individual blocks, try these extensions:
Two-block challenge: Remove cylinders from two blocks simultaneously and mix them together. The child must sort and replace all 20 cylinders into the correct blocks and sockets.
Three and four-block challenge: The full four-block challenge with 40 mixed cylinders is demanding enough for many adults. It is a capstone activity that integrates everything the child has learned.
Blindfold work: After the child is highly proficient, introduce a blindfold. Now they must rely entirely on tactile discrimination — feeling the weight and dimensions of each cylinder and each socket. This dramatically refines their tactile perception and is genuinely challenging.
Measurement connection: Use a ruler to measure the actual cylinders. “This one is 5 centimeters tall. This one is 4 centimeters. How much taller is the first one?” This bridges the concrete material to abstract mathematical concepts.
Why cylinder blocks endure
In an era of educational apps, interactive screens, and AI-powered learning toys, a set of wooden cylinders in a wooden block seems anachronistic. Yet these materials remain in virtually every Montessori classroom in the world, more than a century after their creation.
The reason is simple: they work. Not because they are old, not because Montessori was infallible, but because the design principles are aligned with how the human brain actually develops. Concrete before abstract. One variable at a time. Self-correction over external correction. Hands before screens.
Modern neuroscience imaging studies confirm that physical manipulation of three-dimensional objects activates brain regions that screen-based activities cannot reach. The somatosensory cortex, the motor cortex, the prefrontal cortex, and the visual cortex all engage simultaneously when a child works with cylinder blocks. This multi-region activation creates the kind of robust neural connections that support learning across domains.
If you invest in one set of Montessori sensorial materials for your home, make it the cylinder blocks. They are the foundation on which the rest of the sensorial curriculum builds, they directly prepare the hand for writing, they develop the concentration that every other academic skill depends on, and they provide your child with the deeply satisfying experience of mastering something challenging through their own effort. That last part — the experience of earned mastery — may be the most important lesson of all.
For more puzzles and problem-solving materials, see our guide to the best Montessori puzzles.